Auto Add Options
The Settings widget within the checklist configuration contains Auto Add options.

To assign the checklist automatically to all new hires, select the Auto Add to New Employees box. If the checklist should not be assigned to all new employees, a filter option is available to customize the type of new hires who should receive the checklist.
The filter contains fields such as Account Status, Address options, Benefits, other Custom fields, Cost Centers, EIN, Managers, Profiles, Pay Type and more. When a field is selected and an option chosen for that field, the checklist is auto assigned to the appropriate new employees who meet the filter criteria.
To assign the checklist automatically to all current employees, select the Auto Add to Current Employees box. If the checklist should not be assigned to all employees, a filter option is available to customize who should receive the checklist. When selected, a user meeting the selected criteria via the filter is assigned a checklist.
Create a filter
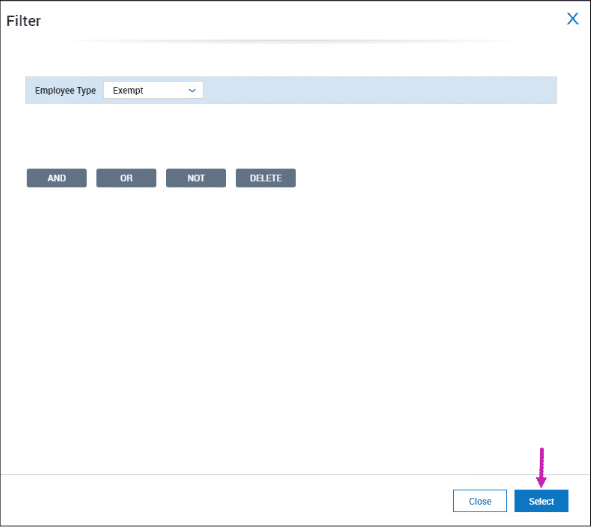
Follow the steps below to create a checklist filter. We use a scenario where we have a new hire checklist which needs to be assigned only to exempt employees.
Click each image for either a visual and more information on the step.

3. Choose the field to filter.
Select the flag icon next to the appropriate field.

4. Select filter criteria.
5. Create additional filters, if needed.

6. Save the Filter.

7. Select Save.

Best Practice Tip
Using Filters to Assign A Checklist on a Specified Date
Scenario
Your company needs a checklist assigned to all current employees on October 1st of the current year.
You can auto-assign checklists to all eligible employees on a specific date. In the filter, select Custom Date. This allows you to choose a single date via the Date Picker.
The selected date tells the solution when to assign the Checklist.
In addition, you can set a recurrence of when the Checklist should be auto assigned.
Was this article helpful?
That’s Great!
Thank you for your feedback
Sorry! We couldn't be helpful
Thank you for your feedback
Feedback sent
We appreciate your effort and will try to fix the article